Showing posts with label Kitchen. Show all posts

Monday, February 15, 2010

Will (someone's) real kitchen please stand up?

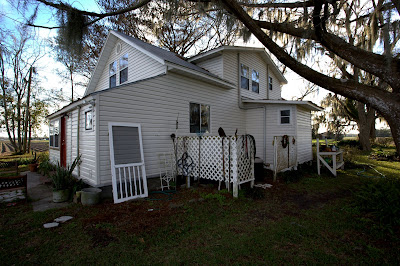
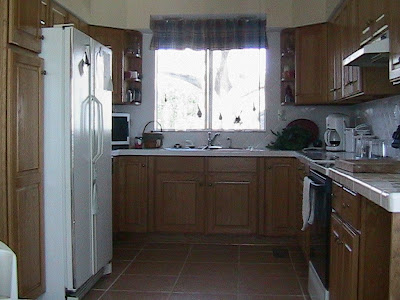
Okay, I know that I've done a whole lot of complaining about the kitchen in this old house...like how bugged I am by the fact that the previous owners put in a 1980's kitchen in a 1909 house when, if I understand it correctly, they started from scratch for goodness sake! Or how the cabinets are not standard size......etc. and so on....!

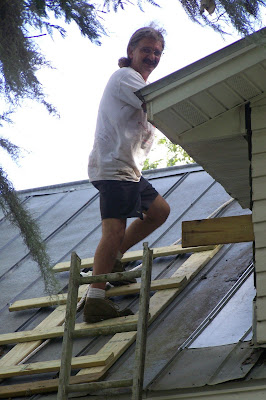
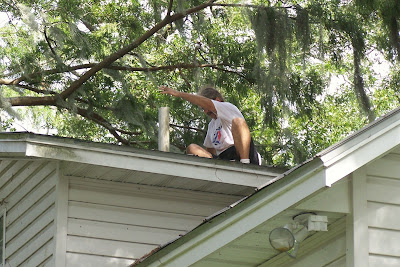
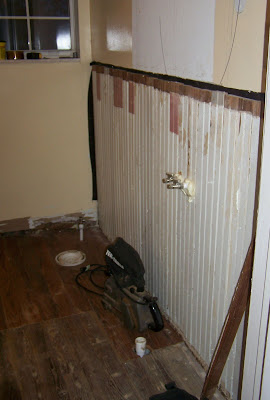
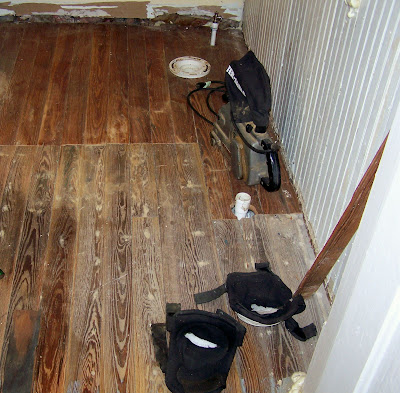
Over a year ago, I talked David into letting me paint the damaged cabinet exteriors to get me by until we gut the whole room and start over...I've yet to get there. Its a daunting job on its own but factor in that we don't have a workshop to do the stripping, sanding and painting in...and the winds we get around here that limit the outside work we'd be able to do and well....I've been putting it off. And I'm beginning to think I may not get to it until we do the gut job....because now I've got tile issues....as in, they're rising up in rebellion!

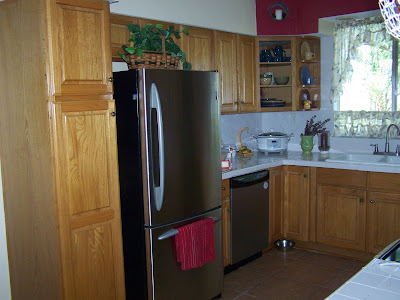
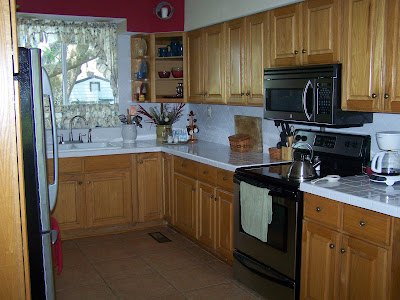
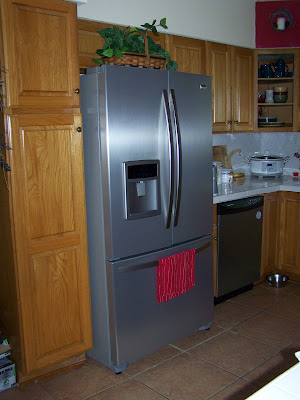
Anyway....I do a lot of cooking and baking (we bake our own breads 95% of the time) and without even re-visiting the issue of inside cabinet storage, the counter top space is a lack we live with as well. I've currently got my counter top appliances stashed everywhere...some in lower cabinets, some in a open cabinet and some on the counter's.....with the end result that I have to remember where I've stashed what! Too frustrating. So, I've been looking for some inspirational photos of kitchen's like mine where busy cooks live and work....but all I've found are kitchen's where everything is hidden to make it look bigger and brighter and well....to be honest....unused...! I want to see a real kitchen where all the appliances are out to be used and appreciated....and there don't seem to be any out there.

So, if any of you out there have less than perfect kitchens with appliances out in the open (and flour spilled down the doors...you know, a real, used, kitchen) ......feel free to share them...

Thursday, September 11, 2008

No more leak!


Our Welcome Mobile after Fay....we just discovered it was broken...
I think I like it this way just as much - photo by Nikki!

David spent the better part of the last two days on the roof getting that leak repaired and while up there, he did the attic venting for the plumbing....we're a whole lot closer to getting that upstairs bathroom done AND we're ready for the next major thunderstorm to boot...that is a good feeling!


The sled thingie....last time we used scaffolding since it was a much more involved and dangerous job....this time, ingenuity did the trick...a lot less expensive!


Venting through the attic!


This is what we got when the job was completed...a silly but happy man!

The bead board is up on one complete wall waiting to be scraped and sanded....and the belt sander is up there waiting to be used on the old flooring.....

We started sanding the floor with a regular sander but it just wasn't cutting the mustard...or the 100 years of dirt and varnish etc....so we switched the the belt sander to complete the sanding...then discovered we needed a new belt......another delay!

I'm still working on Hunter's game room....what a job. Because the landing is full of tools and bathroom things (pedestal sink, mirror, sconces, etc), there is nowhere to move the furniture to except the middle of the room.....so I'm working on a wall at a time. The most time consuming wall of his room is complete...the trim and the doors are completed as well as the wall. I've also been doing some touching up in the bedroom (remember, I ran out of the ceiling color while doing that room and am finishing it up this time around).

I'm a bit concerned about the wall color - we cut the formula 50% (of the color in the bedroom) but the shade difference is not quite what I thought it would be....this may be a temporary color if it closes the room in too much. It works in the bedroom because of the architecture of the ceiling, but the game room's ceiling is a lot lower (I don't even need a ladder or stool to cut in and I'm 5'6). I'm hoping the accents of white make it work because I really don't want to have to buy another can of paint or do the work again. Because its a boy's room, it may just work out.

Well, enough delay....time to get painting!

Friday, September 5, 2008

Thanks Hannah!

Despite the fact that our weathermen and women continually stated that Hannah would affect the coastal/beaches area with wind and rough seas and very little rain, here we sit watching the sometimes mist, sometimes gentle rain come down around us.

Tin Roofs and water don't mix....at least not when you are trying to repair a leak that made itself known in the rain bands of last weeks Gustav....! During one of those bands, as I cooked dinner, the wind came up, the hail came down and the rain came in....right through the soffit over my sink. And down behind the tile backsplash. The leak required three pots to catch the drip.


That's the kitchen window just behind the trellis. The leak is in the portion of the roof just above it where it joins to the raised roof line...this area holds an eave. Our PO's roofer was an excellent plumber. Photograph by John Binkley January 2008 (the door is back where it should be - a storm had blown it off the day before John came down to photograph us and the place)

So. On David's days off this week, the plan was to fix the leak. We know right where it is. Yesterday we made the trip to the Depot for the required materials. And then he improvised on what he called a "sled" to make his venture to the slippery slope of the offending portion of our roof as safe as possible. Yesterday was filled with preparations to complete the repair today.

And then, this morning, bright and early...up he went.

And then down he came.

Cuz Hannah changed our plans. The pots are now ready. There is now a bucket in the eave. And the roof will now have to wait until Tuesday...David's next day off. Just in time for Ike.

Oh well.....this is life during Hurricane Season in Florida....but at least we get ample time to heed warnings of these storms...unlike tornados and earth quakes. You gotta count your blessings...even when you want to spend a little time screaming.

Thursday, September 4, 2008

Country Home~~~

I've been going through magazines like crazy lately. The kids are back in school and now is the time of year when I get back to decorating...which includes not only pulling out the fall decorations but finishing up and/or beginning the many painting projects that I have lined up. (I usually don't paint rooms when the house is full of folks - its too disrupting to all of us!).

I've already been through my collection of Country Living, Country Home, Traditional Living and Cottage Living mags; I've cut out idea photos and gotten them all organized, but today...while shopping at the Depot for some roofing materials, I picked up the new issue of Country Home to browse while David shopped.

About 3/4's of the way through, I stopped flipping pages. I walked over to David and showed him the photographs that had so caught my attention....."there, this is what I've been trying to achieve. It will work because...look....and look....~". He disguised his dis-interest rather well I must say. After all, he was concentrating on what he needed to fix up the new roof leak that we discovered in one of the rain bands from Gustav that came through last week. But, he's been married to me long enough to know enough to just nod and say "I like it!". And then grimace just a bit as I added the magazine I was just going to browse through to our cart!

After returning home, Nikki and I spent a pleasant hour with the magazine and our cups of coffee..and then I surfed on over to the Country Home Site to see if I could link to a photo or two, just so you could see the colors that so caught my attention, but there is no link to that particular story and no photos that I could find.....I guess ya'll just have to pick up a copy in your own local Depot....~

"92 LIVING COLOR The improvisational decorating style of Monique Shay results in a color-filled home, thanks in large part to her collection of vividly painted French-Canadian farmhouse furniture. "

I've so wanted to play with colors in this house but the most I've been brave enough to attempt is the blue of Hunter's room; I've gone back to my trusty Benjamin Moore's various shades of yellow in every other room. Hunter's blue was a great success and bolstered my courage a bit but I still was afraid to just fly with my "vision" of what the rooms in this house could take.


This particular article has shown me that I can take some risk with color....according to the designer, the various shades of blue and green, yellow and red that she used throughout the different rooms (on the trim and on pieces of primitive French Canadian furniture) work because she stuck to shades of "vanilla" for the walls of each room. Which was a bit of a surprise to me because, due to the impact of the colors that filled each room with interest, I never even noticed that the walls were all such a neutral.

All the trim in this old farmhouse of ours is painted with Benjamin Moore's White Drift and we have no plans to strip away the 100 years of paint as we have no way of knowing what is original and what had been replaced by our PO's. With the menagerie of animals and people that live in this place, keeping them clean is a constant battle....I have long entertained the idea of going with darker colors that won't show so much of the living that goes on in this home. This article has shown me that painting with those colors throughout the house can work.......with my basic yellow walls (Benjamin Moore's Montgomery White, Philladelphia Cream, and Waterbury Cream from their Historical Collection).
And the primitive pieces we have (some painted, some just refreshed with Antique Restore) will also work in this style of decorating and adding interest with color. The designer layered on even more color with throw rugs, pillows and blankets throughout the house....another thing I love and have already attempted to do.

As I said, now that the kids are back in school and quiet time can be found in this old farmhouse for at least 5 hours each day, I'll resume my interior painting projects. Hunter's game room is next on the list...with the landing and bathroom and Master Bedroom to follow.....and then the downstairs....with the kitchen cabinets finally going from 90's stain to a more appropriate antiqued green.....

I am energized.....wish me luck on breaking free from the habit of "yellow". I'll post photos as I go!

Friday, July 18, 2008

Heart of the Home DIY Project~~~

“This post was written for Houseblogs.net as part of a sweepstakes sponsored by True Value.” Like all Not so Annonomous Old House Restoration Addicts (if there isn't a support group under that name, there should be, eh?), I'm constantly on the look out for ways to save money and ways to brag about what we've accomplished in our old house. Friends and family can then easily imagine my excitement at hearing about this contest regarding individual bloggers favorite DIY projects; any reader interested in submitting an entry or just interested in the facts about the contest itself can read about it in the Feature Story at houseblogs.net.

Deciding just which project to use in this entry post was a bit daunting; most of the restoration is hidden....behind walls and electrical panel boxes and paint and stuff - since we didn't take enough before and after photos, our choice of project to use was a bit limited.

In the end, I decided to use the "heart" of this farmhouse....the kitchen redo. Not only was it the most visible area needing attention at our purchase of this house, but it is the entry point for family members upon their return from where ever their roaming may have taken them, be it middle school or the day job, college, or the first attempt to fly free of the nest by homeownership or tenancy. It is also the place where the majority of our social interaction with friends and family naturally occurs.

Even though David and I owned and operated a home repair and remodeling business for a time, we still need help every now and then in accomplishing some of the projects we get into in this old farmhouse....when we need advice on the "how to" questions, we visit the TrueValue Project Library. I am naturally pleased that I can be a part of this contest sponsored by them! Thank you True Value~ and Houseblogs.net!

So, on to the photos and the history of our "Heart of the Home DIY Project"~~~~

BEFORE PHOTOS......


The very 80's kitchen with its blue countertops and mismatched appliances - this kitchen replaced the one found by the Previous Owners which was outfitted with antiquated appliances, sink, and two shelving units hand made by the farmer who built the house.


The eleven year old stained, curled, and torn up linolium

The flooring of the kitchen where it met the mudroom-the P.O's enclosed what was a back porch (with the first outdoor bathroom off to the left as you entered) but had not yet completed the flooring.

AFTER PHOTOS.....

First up on the Reno list - The new porcelin tile floor is continued into the mudroom; its darker color was necessary due to all the traffic in this old farmhouse...., the counter tops were tiled as was the blacksplash; the faded, flat paint on the walls was replaced with a warm yellow....one of many colors this kitchen has seen in four years. - The gaps left in the previous reno between the flooring and the wall bottoms were insulated and sealed....I won't mention the dead things coming in through those gaps which we found when we moved those appliances during the flooring install.
Moving out the stove during floor installation, we were horrified at the state of the electrical wiring - how the house hadn't burned down is a question. David put a temporary fix on that safety issue and kitchen wiring was redone completely in 2006. We extended the counter top near the stove and made room for our trash can....I needed the extra space for cooking! Future plans include replacing the solid panel with a "leg".
The stainless steel sink and its tarnished faucet were replaced with a white farmhouse double, deep, sink and the new faucet is in brushed nickel.....tarnishing isn't an issue since the kitchen reno included a new water treatment system on the well....Finally, the mis-matched appliances were replaced with energy efficient stainless ones...our electric bill plummeted again; the observant among us will notice that there is now an accent color in the room....


The 4 year kitchen reno project is still not quite complete....as we live here, we think of newer and better ways to accomodate our family needs...not only in this room, but in others in the house.....each new addition to our home, whether it be a renovated kitchen, bathroom, laundry room or bedroom leads to renewed desire to continue to improve it all.......and since the kitchen is the heart of our house, it seems to keep evolving and evolving.....

Once all the stainless appliances had gone in, I whipped out a magazine photo I’d tucked into my idea binder to show David…..

Me: “look honey…see how pretty that green cabinetry looks against stainless steel?”….

David: “hmmm, yeah?……..

Me: “I can sand and prime and antique paint the cabinets to make them look more appropriate in this old farmhouse….and replace the hardware…..and oh, wouldn’t that be great?”

David: “don’t talk to me!”

Anyway, I’ll be painting the cabinetry this summer….it only took four years, new tile floor and counters and stainless appliances to get my way….but I’ve learned that good things come to those who wait……………………..! And hopefully, to those who enter contests!

Sunday, June 8, 2008

Construction Zone...........

The upstairs bathroom is demolished...the only thing left in there is the old bathtub and no, its not a claw foot, cast iron one but it is staying for the time being. We're working around it.

The water was turned off to that room just over a week ago, when David finished the plumbing to the kitchen (new ice maker/water dispenser) and the outside shower. So, we'd had a few days to get used to not using it before the demo began. The sink cabinet came out first....followed by the toilet and as I write this, I hear the sounds of the floor being torn up and carried out.....

We seem to live almost constantly in a construction zone. There's always something in a room that doesn't belong there...i.e. just to my left there is a pile of flooring - Brazilian something or another - that we were given to use in the new downstairs bathroom. Its been here since March and will likely be there until the end of the summer.....I've gotten to where I don't really see it anymore - although I wasn't very happy to return from SC (and Dad's surgery) to see it piled high on my office floor.

As I sit listening to David and Hunter making tons of noise, I find myself remembering a conversation that took place at a Cub Scout Planning Meeting a couple of years ago.....Since we moved down here, most of the folks that we see in our wanderings as Hunter's parents don't know that we've already raised two kids. The assumption is either that we married late or that we had a child later than most. Anyway at this meeting, all the planners were sitting and chatting while we waited for the Scout Master to come into the room. Someone asked David and I about our progress on the house and before we could open our mouths, another parent said "oh, never renovate your house, you'll get a divorce!". David and I just looked at each other and smiled...then we explained to her that we'd been married for 24 years (at that time), had three kids, ran a home repair business for a time and were constantly renovating something and were still going strong, thank you very much.

Anyway, its a good thing that we have a strong relationship since we live in a constant construction zone.......

Wednesday, May 21, 2008

Kitchen Floors and all that...Part II


See that photo of our old New Fridge? Well, that poor little fridge decided to give up the ghost on us shortly after we bought it; no one is completely certain whether it is a "bad" model (that's what some of the various repairmen who traipsed through my house over the last 6 weeks thought) or whether this fridge itself just was a "lemon". Thankfully, experience has taught David and I that you need that warranty that is offered to you when you buy a house or an appliance especially if you are buying a previously owned house or appliance. And that poor little fridge was taken out the door this morning and replaced by a brand new larger one because we have learned through experience.

Here's a plug for Sears and their warranties...they mean what they say and they don't argue with you to provide what they promised. Last week, the final repairman to visit the house said to me "well, it can't be fixed and you'll get a new one under the "lemon" clause of your warranty". And today, the new one was delivered....and I even got a check for lost food items!

Now, I wasn't 100% happy that I had to get another fridge because I loved that little one...it fit perfectly in the kitchen (in my eyes) because it didn't stick out too far past the cabinetry; it wasn't so wide that you couldn't see the cabinets and counters between it and the dishwasher.... and it had black sides that matched the black of the other appliances.... but if I am honest with myself, I knew that that little thing wasn't really big enough for our family. It looked great....but it wasn't big enough and more importantly it didn't work!

So, off we went to Sears to pick out a new fridge knowing we'd upgrade size and write a small check for the difference ...and although we looked for a different brand (in case the brand/model was the problem and our cute little fridge wasn't just a lemon) I wanted to find one just a bit larger but similar in looks to the one we had. There just wasn't anything similar at Sears.......Since we had to buy from Sears as a clause of the warranty, we finally made a decision.....


It looks okay I guess, but its big and its wide and I can't see the cabinetry between it and the dishwasher (just like with my old old one)...but the eye catching thing to me at the moment is that the sides are grey! Part of what I loved about the other one was the black sides....black is slimming don't you know, even in a fridge.

I didn't notice those sides when we picked it out....but David said if I can't get used to the gray a can of black appliance paint will take care of it......I like to paint...in case you haven't been able to figure that out yet....

Anyway.....its big enough inside as well.......it's already cooling the food inside and my frozen stuff didn't lose a bit of coldness in the switchover...and after a couple of weeks of filling bottles with water, freezing them and then rotating them into and out of the fridge to salvage our foods....I am trying not to sweat the small stuff - like gray sides and the feeling that this fridge is screaming for attention when I walk in the kitchen - but for the moment, I am mourning my cute little fridge with its black sides because it didn't scream "look at me" when I came inside the room....

(P.S. You'll notice I haven't painted the cabinets yet...that's because we're in the middle of plumbing projects getting ready to blow off the bathroom.....more about that later!)

Friday, May 9, 2008

The plumber was a good roofer, but what was the electrician?

Most of the old farmhouses we had looked at during our three year search didn't have laundry rooms......we either saw washers and dryers on back porches, out in sheds, or just a hook up that was visible somewhere on the outside of the house. We were lucky that this house actually had in door laundry facitilities, but it was obvious that renovation would need to be high on the priority list.

Ours was placed in what was the first bathroom added onto the house back in the 1930's; part of the concrete back porch had been walled off, so until our previous owners renovations, you had to go out the kitchen door, onto the back porch and then into the little room to do your business. When the newer bathroom ( and I say that tongue in cheek) was added on to the house, the old bathroom became the laundry room.

Farmers around here were too busy to think much of the aesthetics of anything - their minds were on functionality and anything that was accomplished was done with the least amount of trouble....so, when it was converted into a laundry room, they simply ripped out the toilet and the sink and the shower walls. They left glued on plastic white tile paneling and the shower floor with its sides of concrete raised about 6 inches....they put the newly available electric water heater in the shower floor area and then eventually brought in a washer and a dryer.


Our previous owners had done some upgrading of the room including electrical and plumbing, but as we moved our own appliances in, David grew concerned about the state of it all.....he gave everything a safety inspection but we both knew that we'd have to do some electrical upgrading ourselves rather quickly. In the meantime, we told the kids to never run the washer or dryer unless they were there to watch for fire and plumbing leaks....and never to run either of them just before bedtime.


Over the next few months, we realized just how poorly the electrical in the kitchen and laundry room had been upgraded.....we couldn't run the dryer and the oven at the same time or we blew the circuit.....when we moved out the stove to lay the new kitchen flooring, we found the outlet and box lying on the floor beneath the stove instead of in the wall where it was supposed to be.....it appeared from the evidence that it had never been put in the wall permanantly!


The most scary episode however was just before a trip to South Carolina in June......we loaded up the truck and started out the driveway and just as we hit the road in front of the house, I realized that we had forgotten to get the coffee pot (we always take this with us because we are huge coffee drinkers in the morning!)....so we pulled back in the driveway and inside I went to get that thing..... When I went to pull the plug, I felt heat....a lot of heat....and I couldn't get it to release from the outlet. I finally pulled just as hard as I could and was horrified to see that the plug had melted down to nothing and since we uplug the coffee pot each night before bed, this had happened in the last few hours~~...........heading out of town for three days and with no GFI, we had been pretty close to possibly returning to a burned out house....had I not remembered that we had forgotten the coffee pot........ David did some emergency pulling and patching and unplugged everything that could be unplugged and then we headed out about two hours later....I said a lot of prayers that weekend...and drank a lot of MacDonald's coffee.


When we returned home, David did another inspection of all the electricals in the house and outside the house...only to find that one of the outside outlets had also apparently caught heat at some point....but this one had a GFI on it that had done the job it was supposed to do.....


I didn't get many photos of the laundry room and electrical redo because it was a lot of work for all of us....holes were both found and made in a couple of walls that had to be patched, mudded, sanded and painted.....it was dirty job, but in the end, we could rest easy at night knowing that all the other horrors of a poorly done electical upgrade had been taken care of.... you know, the Previous Owner told us that his plumber was a good roofer........I wonder what his electrician was good at?


investigating the holes 2004
The plastic white tile paneling was uneven (apparently having fallen off the walls through the years) so we pulled off the upper bits to about half way....we found three huge holes in the wall....so that's why they put up this stuff.....

Dead lizard - 2004
Guess what we found in the hole? Reptile corpses......newspaper and other things....

Rat's nest in water heater
And when we went to remove the 40 year old, 25 gallon water heater, we found this rats nest under the lid....although there was no evidence of recent habitation, I took the photo and ran...leaving David to deal with it.

David let me paint the trim green.
After checking for other holes, we decided to leave up the lower half of the paneling and I'd give it a paint job.....I got out all the leftover paint cans and went to town..... the electrical wire is now enclosed in a casing of some sort.....

Photobucket
David going in to run the new plumbing - he loved this part of the job...its kinda scary underneath the house!

Saturday, May 3, 2008

Kitchen Floors and All That!

I’m learning that in this area, the kitchens were outdoors until about 1910 or so; summer kitchens were built in the yard to avoid heating up the entire house with meal preparation…..when kitchens evolved into actual rooms attached to the main house, small families put in what amounted to a “galley” kitchen while larger families added the large square kitchens most associate with farmhouses…..although wider than a normal galley kitchen, our kitchen is a long rectangle.

When our P.O’s took up residence and renovation in the late 1980’s……all that was in the kitchen were an old stove, an old sink, and simple open shelves built by the farmer held the necessities of a cook.

Those shelves were in the cupboard under the stairs (known in our house as the Harry Potter Cupboard) when we moved in…..one is now used in the mudroom for “junk” baskets and the other holds all my genealogy binders in my office!


The very 80's kitchen - taken on our second viewing of the house (Dec 2003)

The P.O’s put in a very 80’s kitchen…..in fact, the only difference in the cabinetry in this kitchen and the one I left behind was the hardware. The blue counter tops, while very pretty, were not what I wanted in my kitchen (I had just upgraded our kitchen from blue to white in the old house); and the floor…well, linoleum put down in the late 1980’s doesn’t look very nice in 2004…that was renovation #1 on my list after completing the task of giving all the walls and trim throughout the house a fresh coat of paint.


Our Shanna laying on the worn out linoleum the day we moved in


The flooring of the kitchen where it met the mudroom (2004)


With all the other renovation that needed done in the house, my dream of having a “period” kitchen was going to have to wait a few years…..I’d need to make do with the kitchen I had….but I could make some changes to it…..and changes have been made in between the larger, more important projects like electrical update/upgrades, plumbing changes, insulation and wall repairs etc…..

Note the new floor and the white tiles - Sept 2004 - Jan 2005

We extended the counter top and made room for our trash can....I needed the extra space for cooking!

September 2004 – January 2005 - The first thing we did was lay new flooring - a porcelain tile; the tiles were laid during Hurricane Jeanne - shortly after New Year's Day, I began to lay the tile on the counters and back splash


March 2008 – Finally, we were able to replace the appliances – not one of the old ones matched another one in that kitchen…and the fridge had been a trial to me since the day we moved in…..In fact, at one point David and I went shopping for a new fridge shortly after we moved in; but I couldn’t afford any that I loved and so decided to live with the one I had until I could…..I’ve learned that good things do indeed come to those who wait…..


The new fridge and dishwasher

The new stove and over the stove micro - not the new white sink and faucet (put in January 2006)


Nikki’s new friend, Gerard the Professional Painter, had a stainless fridge, flat-top stove and dishwasher for sale for less than a $1000.00 total….we jumped on it…..and then of course, my old counter top micro (white with a black door) no longer “fit” the kitchen…nor did the old stove hood……so David and I went shopping…we found a dented over the stove micro and talked the shop owner into selling it to us at a huge discount….in the end, we had all new appliances for less than the price of a new fridge….(I of course used this as an object lesson to my children…I waited four years and LOOK what I got for my patience……blah, blah, blah…..LOL)

Next Kitchen Project

Once all the stainless had gone in, I whipped out a magazine photo I’d tucked into my idea binder to show David…..

Me: “look honey…see how pretty that green cabinetry looks against stainless steel?”….

David: “hmmm, yeah?……..

Me: “I can sand and prime and antique paint the cabinets to make them look more appropriate in this old farmhouse….and replace the hardware…..and oh, wouldn’t that be great?”

David: “don’t talk to me!”

Anyway, I’ll be painting the cabinetry this color this summer….it only took four years, new tile floor and counters and stainless appliances to get my way….but as I said, I’ve learned that good things come to those who wait……………………..!


LinkWithin

Related Posts Widget for Blogs by LinkWithin